MS Unified Service Desk CTI Connector for Dynamics 365

Thanks for your Free trial request of MS CRM Unified Service Desk (USD) Connector.

Before You Proceed…

Get a trial license key of the EF Connector from ExpertFlow.
Make sure
You already have a Cisco Unified Contact Center (Express, Packaged, or Enterprise) installed. If not, you can request for a Cisco DCloud (cloud-based) demo. In the Trial License Key Form, check the option of “DCloud Demo”.
You have the admin credentials of your MS CRM account
Allocate a virtual machine in the network with Microsoft Windows with at least 1 vCPU, 2GB RAM for the EF Connector server setup. See a complete list of EF Connector hardware/software prerequisites here.

Trial setup is a 3-stage process.


Organization CTI Configuration

Install the server-side configurations using a Package Deployer following these instructions.

EF Connector

EF Connector is the middleware between the Cisco contact center and Microsoft USD application. Install EF Connector on a Windows machine following these instructions.

USD Connector

USD Connector is the CTI connector front-end installed on the agent machine where Microsoft Unified Service Desk is already installed. Follow these instructions.

EF Connector Prerequisites

EF Connector is the middleware between the Cisco contact center and Microsoft USD application. The EF Connector can be installed on any Windows machine with the following Hardware & Software specifications. The machine should have network connectivity (latency < 100ms) established between the Cisco contact center and Microsoft Dynamics 365/On-premise server.

Hardware Requirements

Minimum

Recommended

vCPU

1 Cores

2 Cores

vRAM

2 GB

4 GB

vDISK

5 GB

10 GB

Software Requirements

Operating System

A Windows Server 2012 R2 64-bit or above is recommended. For the trial, you may use Windows 10 or any Windows Server edition 2012 or onwards.

Locale Settings

English (recommended)

Java Runtime (64 bit)

Java Runtime (JRE) 8 is required

WinRAR

A package extractor to modify embedded configuration properties

.Net Framework

.Net Framework 4.5.2 or above

1- Organization CTI Configurations

These are server-side organization configuration applied for the EF USD CTI Connector to work.
  1. Download the Package Deployer on any Windows machine with the recent dot-net framework installed.
  2. Enter admin account credentials and select the Organization where you want the CTI configurations to be applied. If you don’t select one, the package will be installed in the user’s default organization.
  3. Click on EF UCCX connector and press next on each of the following screens to complete the installation process.
  4. This setup will install “Expertflow CTI Configuration” in the selected Organization by clicking on CRM -> Settings -> Unified Service desk -> Configuration.

Verifying\Adding View field(s) ‘phone call’ entity

1. Click on CRM -> Settings -> Unified Service desk -> Action Call

2. Open Action Call Named ‘Adding Phone Call Activity -ManualOutBoundCall’. Call status field exists with the default name ‘new_callStatus’.

3. In order to make the sure field with name ‘callStatus’ exist in PhoneCall entity, click On Activities

4. Click on Phone Call

5. Make sure ‘callStatus’ exist in the entity.

6. If the field does not exist. Create it with name callStatus (new_callStatus is complete name as new is the prefix. If the prefix is ‘hli’ then field name would be hli_callStatus & if the prefix is ‘kcb’ then field name would be kcb_callStatus.


*Note: It is not mandatory that field name would be callStatus but the field in phone call entity must be same as in function i-e Adding Phone Call Activity -ManualOutBoundCall)

Verifying\Adding View fields in quick search view

1. Click on Settings -> Customizations

2. Click on ‘Customize the System’
3. Click on entities -> Select an entity e.g Account. Click on views. From the right pane select ‘Quick Find Active Account’.
4. Double click on ‘Quick Find Active Accounts’
5. Click on ‘Add Find columns’

6. In the ‘Add Find Columns view’ select the fields on which you want to search for match purpose & view on the screen.
7. Click on ‘OK’ after selecting the desired columns.
8. Repeat the Steps from 1-6 for ‘contact’ & ‘Lead’ entities as well.
9. When changes are done for required entities click on ‘Publish All Customizations’.

After completing the base server configurations, you need to apply additional manual configurations on MS CRM for adding users to “Expertflow CTI Configuration”, configure additional USD roles and permissions, and optionally apply SSO configuration.

2- Install EF Connector

Download EF Connector Installer
Follow this guide to install and configure EF Connector

3- Install USD Connector

Download & install Microsoft Dynamics Dynamics365.exe (32 bit) from Microsoft’s Website.
Download EF USD Connector and install on the same agent’s PC following the instructions below.

Steps for Installing USD Connector

Extract the downloaded archive using WinRAR or similar and run MS Dynamics CTI Connector.msi.

1. The installation process starts with the following screen:

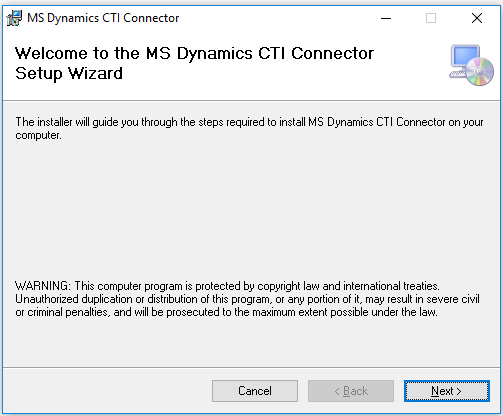
2. Read the instructions carefully and then press Next.
3. Select Contact Center Enterprise (for UCCE, PCCE), Express (for UCCX)
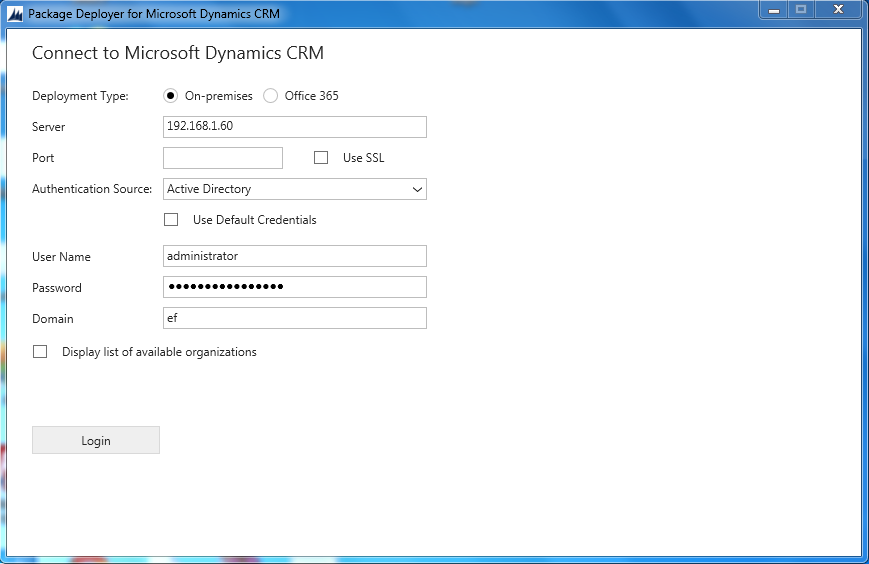
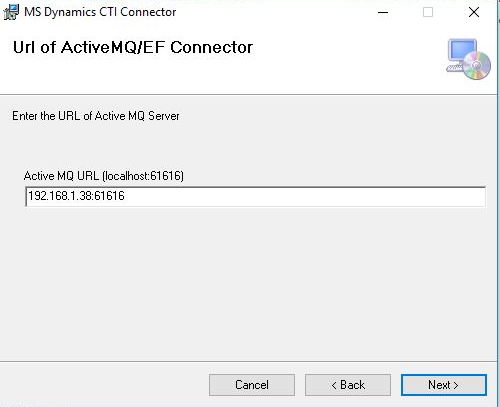
4. Enter the IP address of the machine where Generic Connector (EF Connector) is installed. Specify the port number 61616 as shown in the screenshot. It can be left blank and could be set manually by editing the UnifiedServiceDesk.exe.config file which is present in the installation directory of USD.
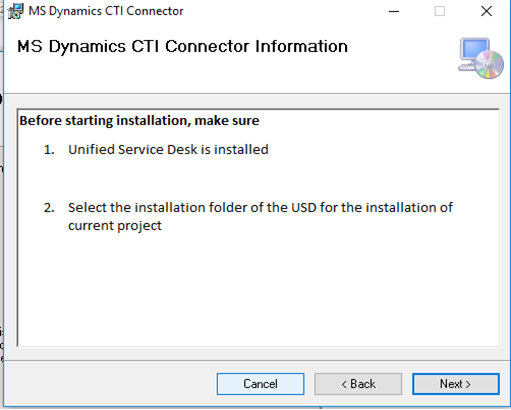
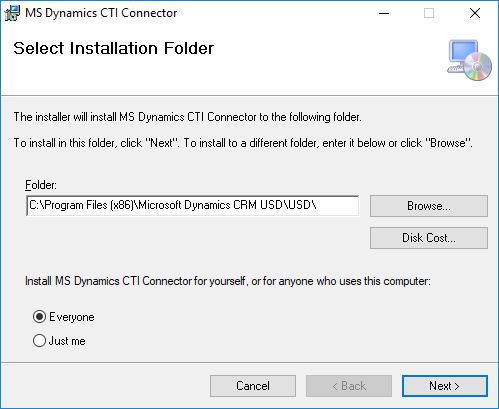
5. Set the installation path, make sure this is the path where USD is installed otherwise, the installation will not be completed successfully.
6 .Click Next to complete the installation process.

Run the Unified Service Desk

1. Enter Unified Service Desk login credentials of the relevant CRM user (working as a Cisco contact center agent). For Dynamics 365 online select the ‘Office 365’ option.

For CRM on-premise select the ‘On-premises’ option

provide the CRM user credentials in order to log in to USD.

2. On the following screen

Click on the Login button and provide the Finesse login credentials.